
Oil Change: Ensuring Smooth Performance and Longevity of Your Vehicle
Maintaining a car is akin to nurturing a living organism. Just as we require regular health check-ups to ensure our well-being, vehicles too demand routine maintenance to perform optimally. Among the myriad of tasks that constitute automotive care, the humble oil change stands out as one of the most crucial. Often overlooked or postponed, regular oil changes are vital for preserving the heart of your vehicle’s engine.
Oil serves as the lifeblood of an engine, lubricating its intricate components, reducing friction, and carrying away heat generated during operation. Over time, however, oil deteriorates, becoming contaminated with dirt, debris, and engine byproducts. This degradation compromises its ability to lubricate effectively, potentially leading to costly damage if neglected. Hence, adhering to a routine oil change schedule is paramount for ensuring the smooth operation and longevity of your vehicle.
In this comprehensive guide, we delve into the intricacies of the oil change process, exploring its importance, frequency, methods, and associated considerations. Whether you’re a seasoned automotive enthusiast or a novice driver, understanding the nuances of oil changes is essential for safeguarding your vehicle’s health and performance.
The Significance of Oil Changes
Oil changes are more than just routine maintenance tasks; they are proactive measures aimed at safeguarding your vehicle’s engine from premature wear and tear. As engines operate, the combustion process generates heat and friction, both of which can degrade the quality of the oil. Over time, oil becomes contaminated with particles, sludge, and other impurities, diminishing its lubricating properties and potentially causing frictional damage to engine components. Regular oil changes prevent such issues, ensuring that your engine operates smoothly and efficiently for years to come.
Frequency of Oil Changes: Debunking the Myths
The frequency of oil changes has long been a subject of debate among drivers and automotive experts alike. While traditional wisdom often advocated for changing oil every 3,000 miles, advancements in automotive technology and lubricants have rendered such frequent changes unnecessary for most modern vehicles. Instead, manufacturers typically recommend oil changes at intervals ranging from 5,000 to 10,000 miles, depending on driving habits, environmental conditions, and the type of oil used. Consulting your vehicle’s owner’s manual and adhering to the manufacturer’s guidelines is the best approach for determining the optimal oil change schedule for your specific car.
The Oil Change Process: A Step-by-Step Guide
- Preparation: Before initiating the oil change procedure, gather all the necessary tools and materials, including a socket wrench, oil filter wrench, new oil filter, and the appropriate quantity and grade of engine oil as recommended by your vehicle’s manufacturer. Additionally, ensure that the vehicle is parked on a level surface and that the engine is cool to avoid burns.
- Draining the Old Oil: Begin by locating the oil drain plug beneath the engine. Place an oil pan beneath the plug to catch the draining oil, then carefully loosen and remove the plug using a socket wrench. Allow the old oil to drain completely into the pan, ensuring that it does not spill onto the ground or surrounding components.
- Replacing the Oil Filter: Once the old oil has drained, locate the oil filter, typically situated near the bottom or side of the engine. Use an oil filter wrench to loosen and remove the old filter, taking care to avoid spilling oil onto yourself or the engine. Before installing the new filter, apply a small amount of fresh oil to the rubber gasket to ensure a proper seal.
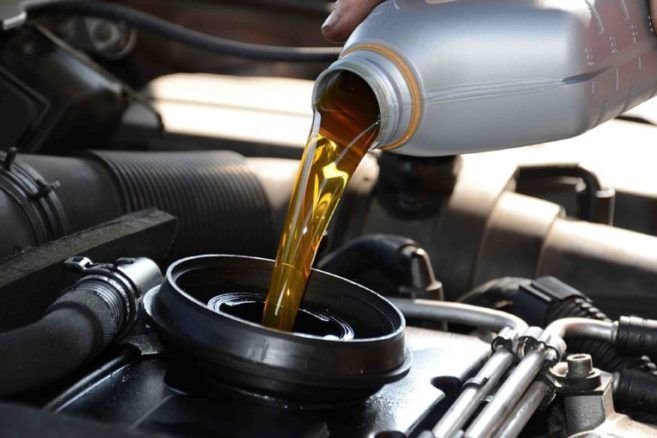
- Adding Fresh Oil: After removing the old filter, clean the filter mounting surface with a rag to remove any debris or residue. Install the new oil filter by hand, tightening it until snug, then reinstall the oil drain plug. Once both the plug and filter are securely in place, use a funnel to pour the recommended quantity and grade of fresh oil into the engine.
- Checking Oil Levels and Quality: With the new oil added, replace the oil filler cap and start the engine, allowing it to idle for a few minutes to circulate the fresh oil throughout the system. Afterward, turn off the engine and wait a few moments for the oil to settle, then check the oil level using the dipstick. Top off if necessary, ensuring that the oil level falls within the recommended range.
- Final Inspection: Finally, inspect the area beneath the vehicle for any signs of leaks or drips. Tighten the oil filter and drain plug if necessary, then dispose of the old oil and filter in accordance with local regulations. With the oil change process complete, you can rest assured knowing that your vehicle’s engine is properly lubricated and primed for optimal performance.
- Dashboard Warning Light: Many modern vehicles are equipped with oil change indicators that alert drivers when oil change is due. Ignoring these warnings can lead to engine damage, so it’s essential to address them promptly.
- Dark or Dirty Oil: Checking the color and consistency of your engine oil using the dipstick can provide valuable insights into its condition. Fresh oil typically appears amber or light brown, while old or contaminated oil may be dark and murky, indicating the need for a change.
- Loud Engine Noise: As engine oil deteriorates, it loses its ability to lubricate effectively, resulting in increased friction and noise. If you notice unusual sounds emanating from the engine, such as knocking or tapping, it may be time for an oil change.
- Decreased Fuel Efficiency: Dirty or degraded oil can cause the engine to work harder, leading to decreased fuel efficiency and increased fuel consumption. If you observe a sudden drop in fuel economy, it could be a sign that your vehicle’s engine is overdue for an oil change.
- Excessive Exhaust Smoke: Burning oil can produce thick, blue-gray smoke from the exhaust, indicating potential oil leaks or internal engine issues. Addressing the underlying cause and replacing the oil can prevent further damage and restore engine performance.