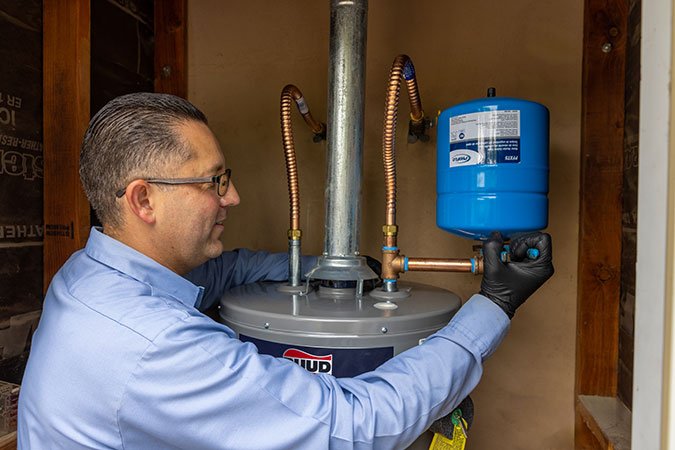

A properly plumbed water heater ensures a reliable supply of hot water throughout your home. Whether you’re installing a new unit or replacing an old one, plumbing a water heater involves connecting cold water supply lines, hot water output lines, and a drain system—while also meeting safety standards. This guide focuses on conventional tank-style electric or gas water heaters, the most common units in residential homes.
Tools and Materials You’ll Need
Before beginning, gather the following tools and parts:
- New water heater (gas or electric)
- Pipe wrench or adjustable wrench
- Pipe cutter
- Copper, PEX, or CPVC piping
- Dielectric unions (for copper pipe to tank connections)
- Teflon tape and pipe joint compound
- Soldering kit (if using copper)
- Water heater flex connectors
- Shutoff valve
- Pressure relief valve (TPR valve)
- Discharge pipe
- Drain pan and drain line
- Garden hose (for flushing or draining)
If it’s a gas unit:
- Gas flex line and gas-rated sealant
- Pipe dope or yellow Teflon tape
- Gas shutoff valve
- Venting components
Step 1: Shut Off Utilities and Drain the Old Heater
If replacing a unit:
- Turn off the water supply to the tank.
- Shut off electricity at the breaker panel or gas supply at the shutoff valve.
- Connect a garden hose to the tank’s drain valve and route it to a floor drain.
- Open a hot water faucet to allow air into the tank, then open the drain valve.
Once the tank is empty, disconnect the water lines and, if applicable, the gas or electrical connections.
Step 2: Set the New Water Heater in Place
- Position the new unit in the same location.
- Place it in a drain pan if on an upper floor or in an area prone to flooding.
- Ensure there is adequate clearance around the unit for service and ventilation (especially for gas models).
- Use shims if needed to keep the unit level.
Step 3: Connect the Water Supply Lines
Cold Water Inlet:
- Install a shutoff valve on the cold water pipe leading to the tank.
- Use copper pipe, PEX tubing, or CPVC to connect the cold line to the tank’s cold inlet (usually marked with a blue ring or label).
- Dielectric unions are recommended to prevent corrosion between dissimilar metals.
Hot Water Outlet:
- Connect piping from the hot outlet to your home’s hot water lines.
- Use Teflon tape on threaded fittings, and pipe joint compound where needed.
- Many homeowners use flexible water heater supply lines for easier installation.
Be sure to secure all connections with pipe straps to prevent movement.
Step 4: Install the Temperature and Pressure Relief Valve (TPR Valve)
This safety feature releases pressure if the tank overheats:
- Insert the TPR valve into the designated port (usually on the side of the tank near the top).
- Wrap threads with Teflon tape and tighten with a wrench.
- Attach a discharge pipe to the valve that terminates near a drain or outside the home.
- This pipe must point downward and be made of copper, CPVC, or PEX (not regular PVC).
Never cap or plug the discharge pipe.
Step 5: Connect Gas or Electrical Power (If Applicable)
For Gas Water Heaters:
- Connect a flexible gas line from the shutoff valve to the unit’s gas control valve.
- Use gas-rated pipe thread compound or yellow Teflon tape.
- Check for leaks using a soapy water solution. Bubbles indicate a leak that needs tightening or resealing.
- Ensure proper venting is installed and meets building codes. Use double-wall or B-vent pipe for natural gas.
For Electric Water Heaters:
- Connect the electrical wires (typically black and red or black and white) to the terminals under the access panel.
- Secure the ground wire to the grounding screw.
- Double-check that the breaker remains off during installation.
Step 6: Fill the Tank with Water
- Close the drain valve.
- Open the cold water supply valve to the tank.
- Open a nearby hot water faucet to allow air to escape as the tank fills.
- Once water flows steadily from the faucet with no sputtering, turn it off.
- Inspect all plumbing connections for leaks and tighten as needed.
Step 7: Turn On the Power or Gas
Electric:
- Flip the breaker to power the unit.
- The thermostat will activate and begin heating the water. Most default settings are 120°F.
Gas:
- Turn on the gas valve.
- Follow the manufacturer’s instructions to ignite the pilot light or electronic ignition.
- Adjust the temperature to the recommended setting.
Maintenance Tips for Long-Term Efficiency
- Drain the tank annually to remove sediment buildup that reduces efficiency and lifespan.
- Check the anode rod every 2–3 years and replace it when corroded.
- Inspect connections for leaks and test the TPR valve for proper operation.
- Install an expansion tank if your home has a closed plumbing system.
When to Call a Professional
Hire a licensed plumber if:
- You’re switching between gas and electric models.
- Your installation requires new gas lines or electrical wiring.
- Local building codes require inspections or permits.
- You’re unsure about venting or pressure safety compliance.
A professional ensures the job meets safety standards and code regulations.
Conclusion
Plumbing a water system Indianapolis involves careful attention to safety, water line connections, and system performance. Whether replacing an existing unit or installing a new one, following these detailed steps will help ensure a leak-free and energy-efficient setup. With routine maintenance and proper installation, your water heater can provide hot water to your home for years to come.